
Down the Rabbit Hole: My Accidental Journey to PyPI
Published:
The other day, I was dragged into the rabbit hole of a bug that does not let you sleep. In my work, I am facing the task of processing a gigaton of microscope images while tracking a dizzy array of tiny objects, all complicated by a microscope camera that drifts unpredictably. The constant need for precise image registration to correct this drift quickly became a critical issue.
Initially, I leaned on a well-known Python package, PyStackReg, which operates with TurboReg’s fast C++ core to perform subpixel registration. However, as I observed its performance under practical conditions, I recognized that the tool was not delivering the stability and speed that I was familiar when using Fiji. Looking at the images, two little quirks really bugged me: a jump in the very first frame of every movie, and a registration that seemed to circle around its equilibrium point. These small details pushed me to develop a new package.
So, I reached out to Tseng Qing, the creator of the TemplateMatching plugin, and floated the idea of porting his package to Python. I tinkered around his code and realised that OpenCV was the one moving the threads behind scenes. With Python’s excellent API for OpenCV, the solution practically wrote itself. After some trial and error, I succeeded in implementing a new registration algorithm.
My surprise came when I took some metrics and saw that it was crazy fast and very precise (see Figure 1). The key part was to focus on solving the Translation problem fast instead of trying to solve all possible cases. Indeed, after working for a while with MONAI, I think the complex registraction issues can be leave to Deep Learning modesl that do regression on the translation matrix, while the simpler ones can be solved with a more traditional approach. While PyStackReg has to build the pyramid features, try some warp -> gradient -> solve until converge -> repeat, the OpenCV uses a template: it slides the template over the target image (like a 2D convolution), producing a grayscale match-map, and then finds the best match, and you are done.
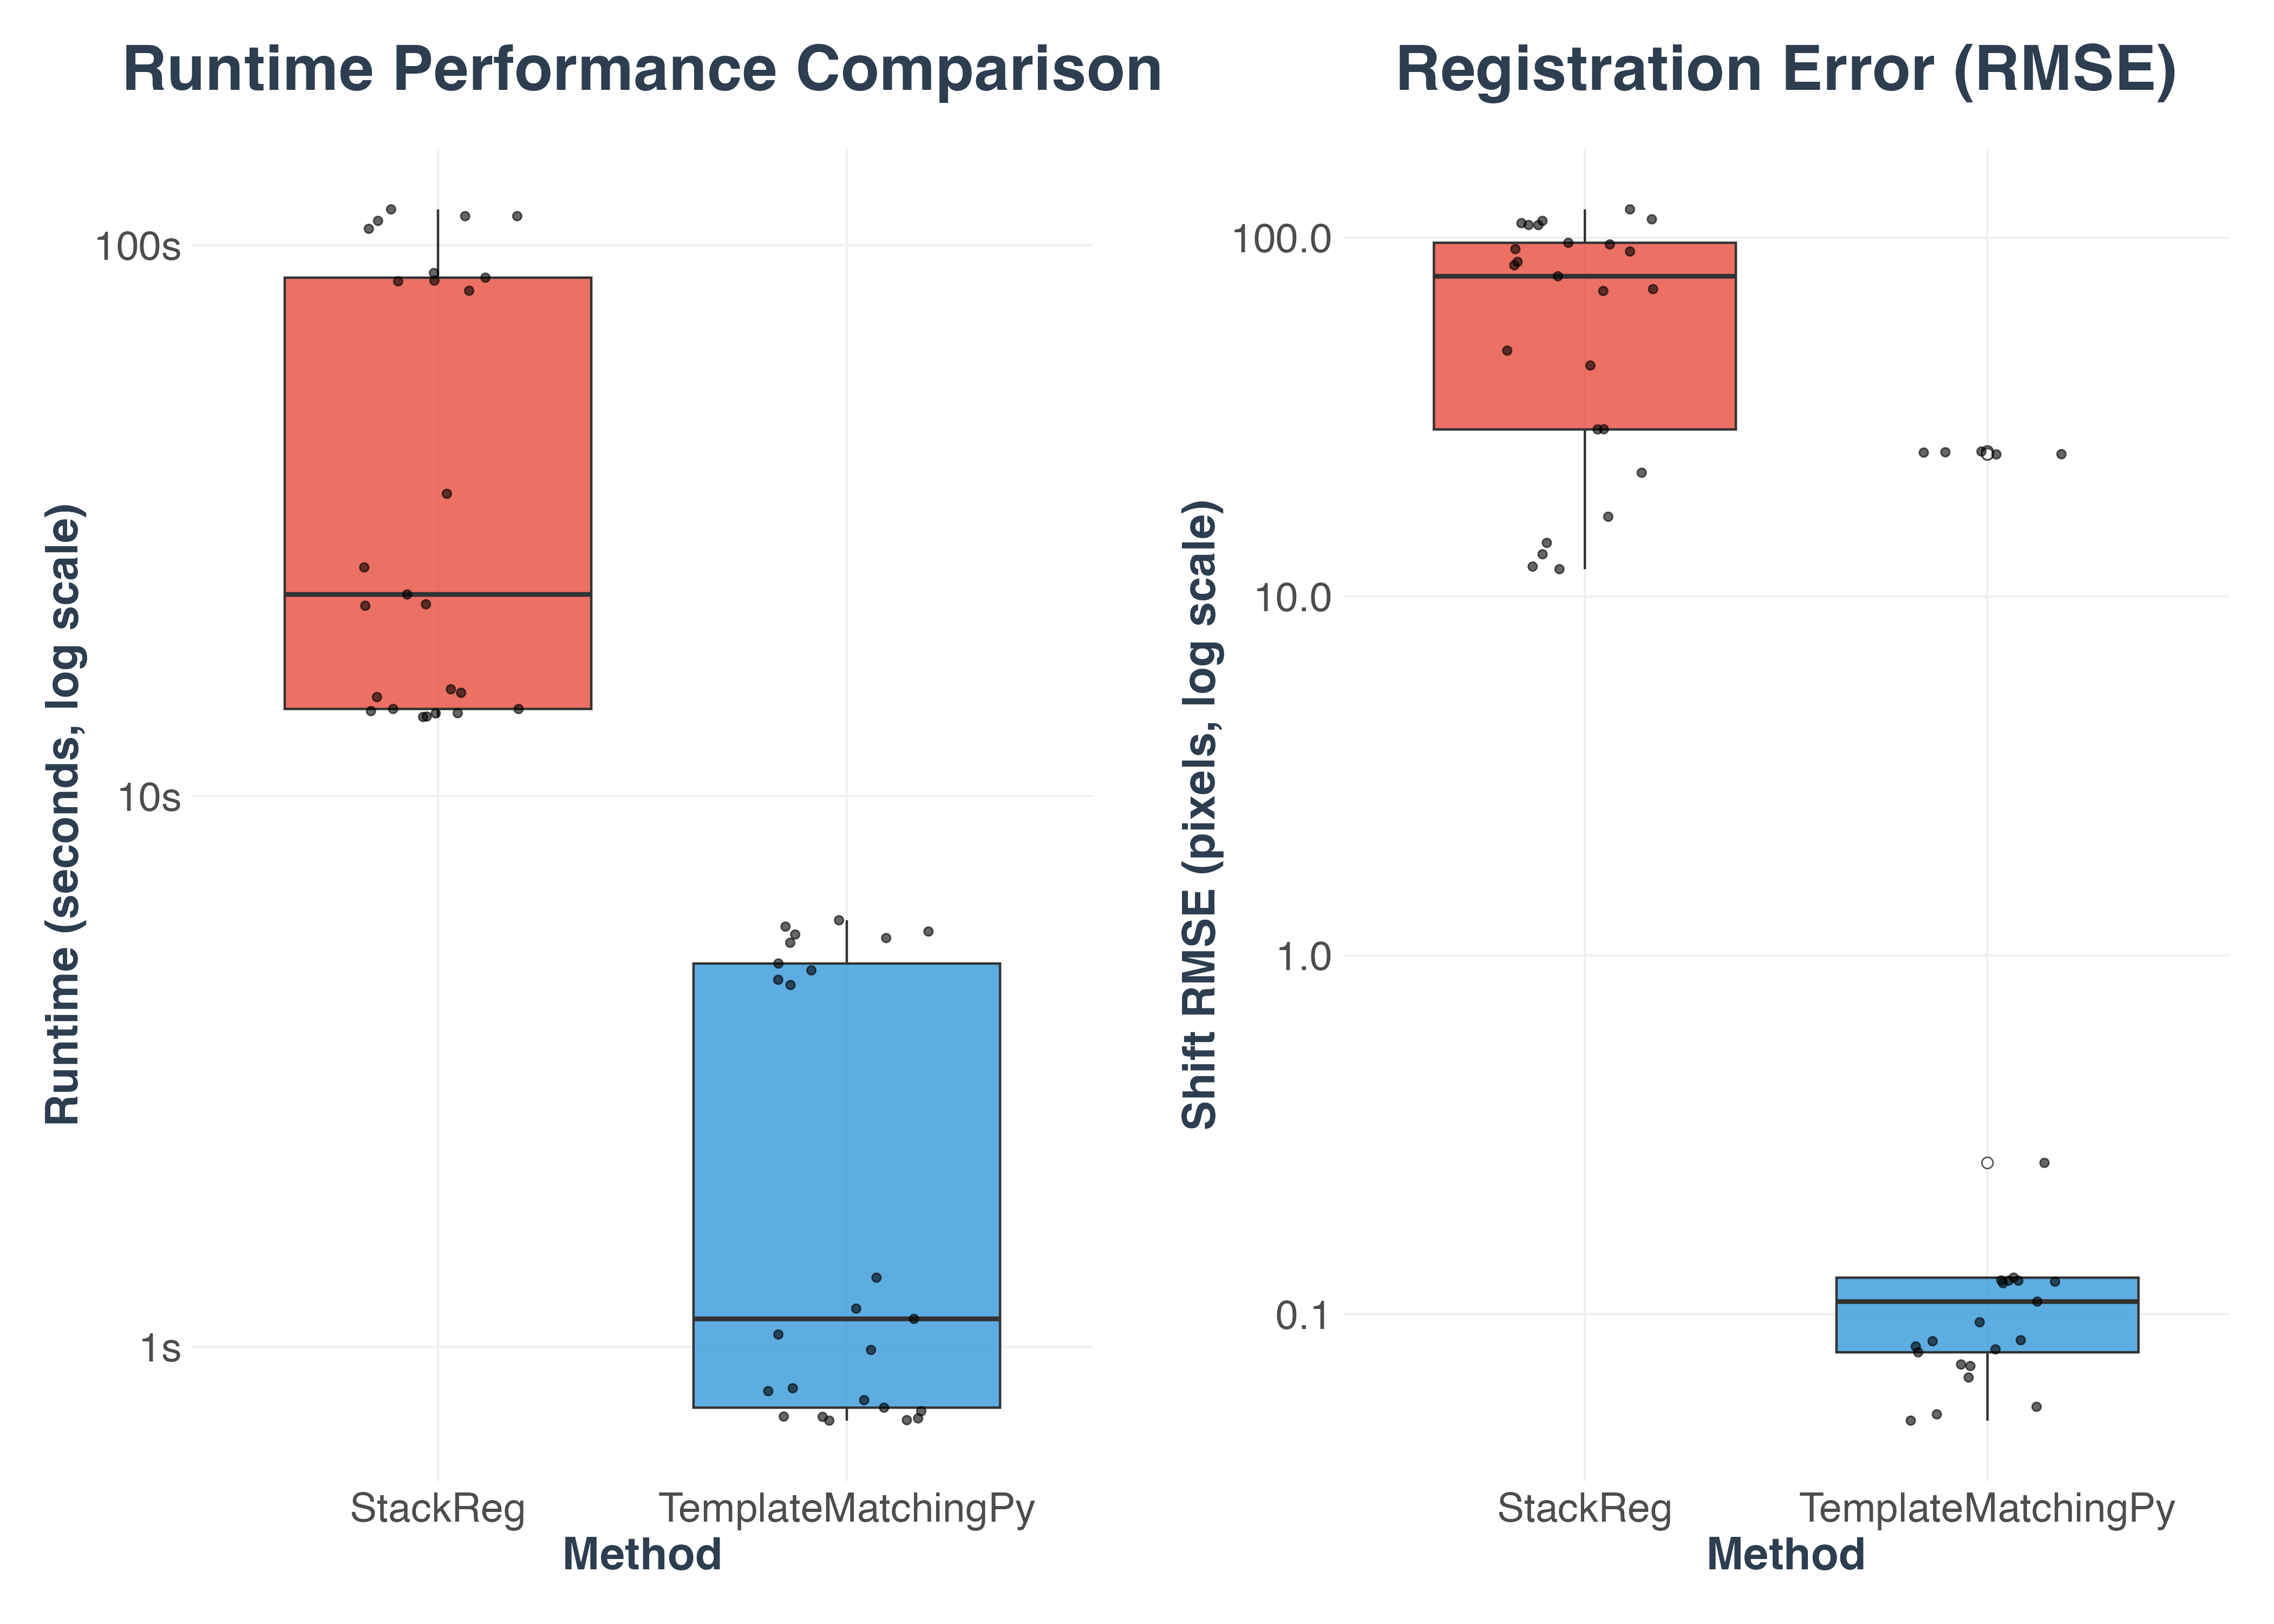
The end result was good (see the image below). First, I was very happy that the jump in frame 1 disappeared. Second, it was much faster, which really helped us in our analysis pipeline. Finally, the aligned images significantly improved our tracking. Given these good results, I decided to package it. You can download it from PyPI here or if you want to see more details, you can check the GitHub repository. Life is good when you follow your instincts; you never know where the rabbit hole will lead next.
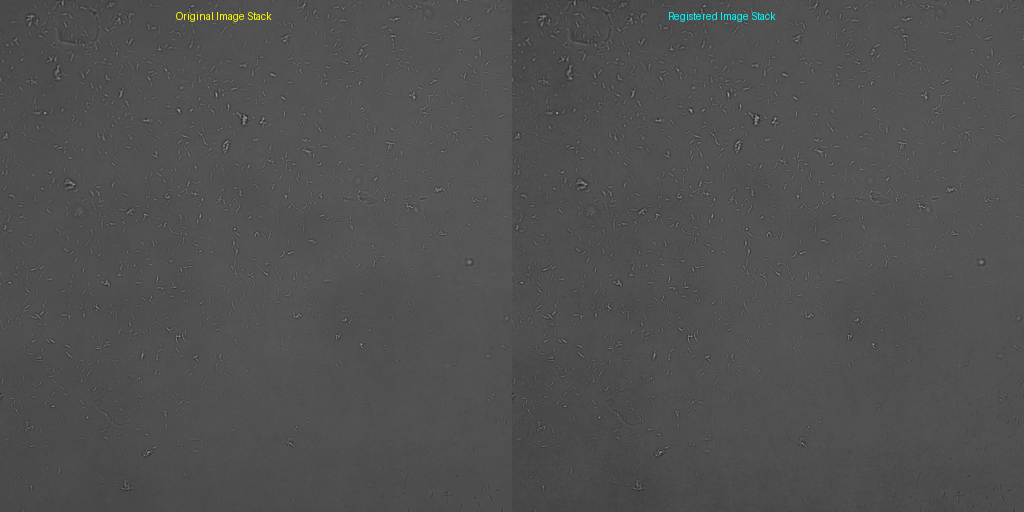
Figure: Comparison showing drift correction results before and after applying the new registration algorithm.